Exercise Guide
In the realm of lower-body aesthetics and functional kinesiology, few movements rival the Glute Bridge for pure isolation and safety. While squats and lunges are foundational, they are often “quad-dominant,” allowing the thighs to compensate for weak glutes. The Glute Bridge, conversely, optimizes hip extension—the primary anatomical function of the glutes—to build a stronger, rounder, and more elevated posterior without the need for high-impact loads or gym machinery.
Anatomical Engagement
The efficacy of the Glute Bridge lies in its ability to recruit multiple muscle groups simultaneously:
- Gluteus Maximus (Primary)
- Gluteus Medius & Minimus
- Biceps Femoris (Hamstrings)
- Transverse Abdominis (Core)
- Erector Spinae (Lower Back)
The 4 Expert-Level Variations
1. The Foundation: Standard Bodyweight Bridge

Focus: Neuro-muscular activation and fundamental pelvic alignment.
Technical Execution: Lie supine with knees flexed at 90 degrees. Position feet hip-width apart. Engage the core to eliminate any anterior pelvic tilt. Drive through the calcaneus (heels) to elevate the pelvis until the torso forms a linear diagonal from shoulders to knees.
Maintain a “hollow body” position by tucking your ribs toward your hips. This prevents lumbar hyperextension and forces the glutes to do 100% of the work.
Prescription: 3-4 Sets | 20-25 Reps (Tempo: 2-2-2)
2. The Isolator: Single-Leg Glute Bridge
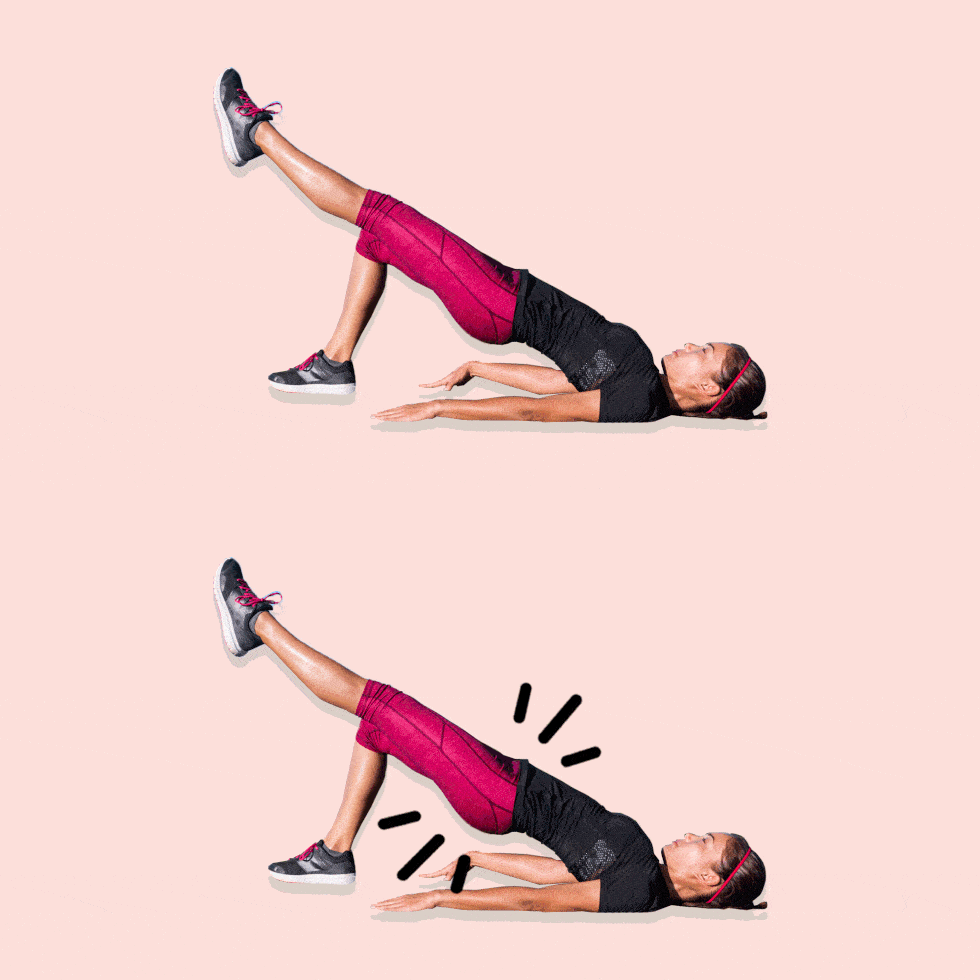
Focus: Correcting muscular imbalances and increasing mechanical tension.
Technical Execution: From the standard starting position, extend one leg fully. Drive the grounded heel into the floor to lift the hips. It is critical to keep the iliac crests (hips) level throughout the movement; do not allow the non-working side to dip.
Imagine pushing the ceiling away with the sole of your elevated foot to maintain vertical alignment.
Prescription: 3-4 Sets | 12-15 Reps per side
3. The Depth Creator: Deficit Glute Bridge

Focus: Increasing the Range of Motion (ROM) for maximum fiber recruitment.
Technical Execution: Elevate the feet 6–12 inches using a stable bench or step. This increased deficit allows the hips to drop lower than the floor, creating a deep stretch in the glute fibers under tension (eccentric loading) before the concentric contraction.
The deeper the hip flexion at the bottom, the greater the potential for muscle growth (hypertrophy) at the top.
Prescription: 3-4 Sets | 15-20 Reps
4. The Sculptor: Abduction-Resisted Bridge
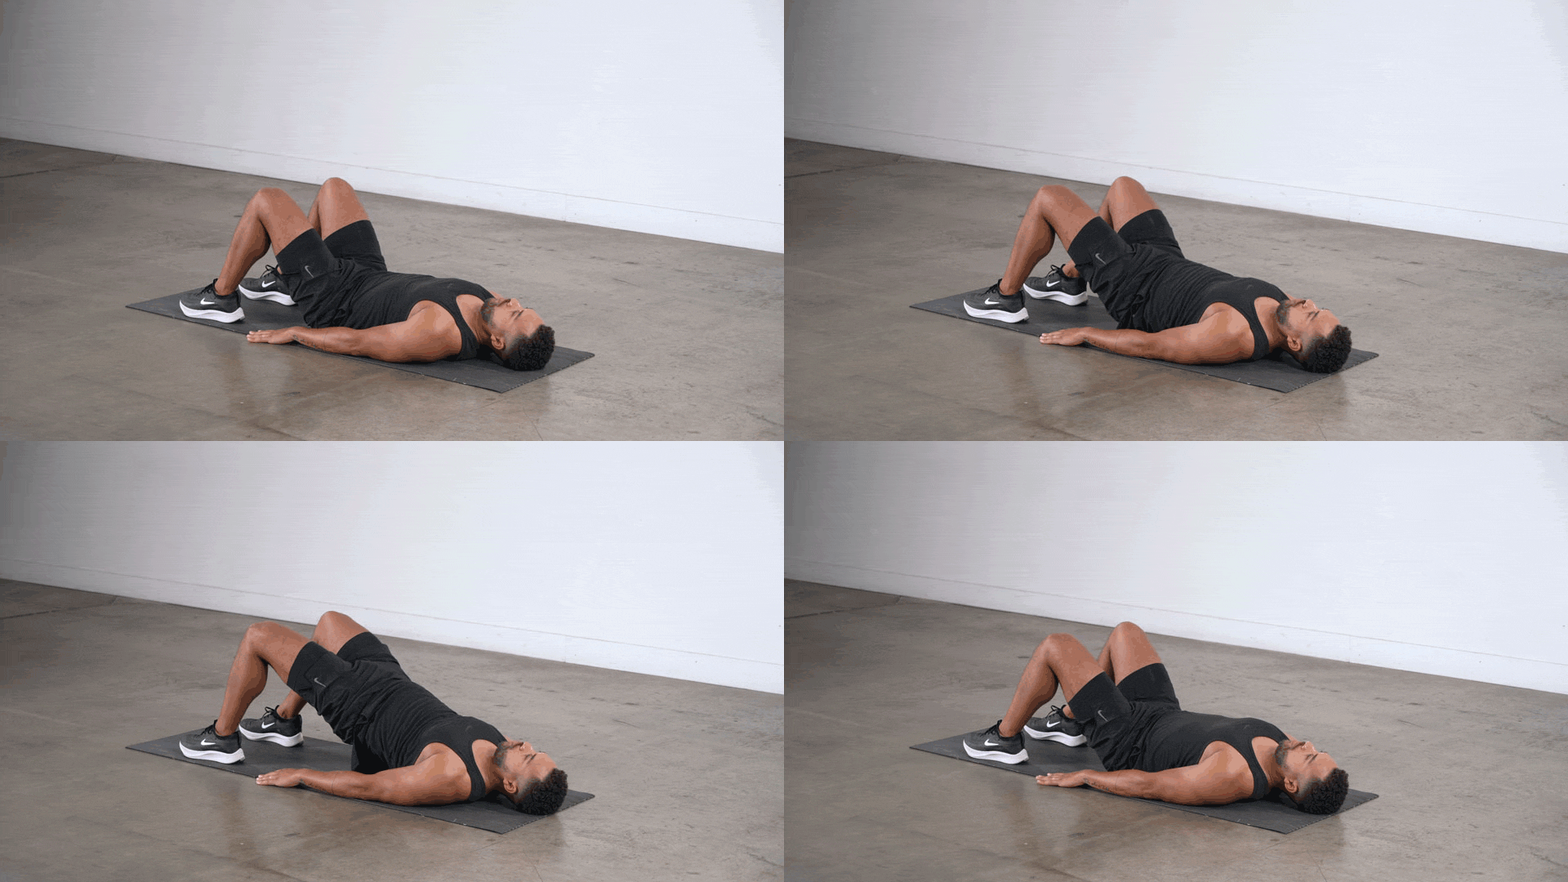
Focus: Targeting the Gluteus Medius for lateral roundness and hip stability.
Technical Execution: Secure a mini-resistance band just above the patella (knees). Perform a standard bridge while simultaneously forcing the knees outward against the band. This introduces lateral tension alongside vertical extension.
Keep the tension on the band constant. Do not let your knees “cave in” at any point during the set.
Prescription: 3-4 Sets | 20-30 Reps
30-Day Progressive Hypertrophy Plan
| Phase | Primary Goal | Protocol |
|---|---|---|
| Week 1 | Neuro-Activation | 3 Sets of Basic Bridge; focus on 2-sec peak contraction. |
| Week 2 | Unilateral Load | Incorporate Single-Leg variations to eliminate imbalances. |
| Week 3 | Mechanical Tension | Introduce Deficit Bridges (Bench) for increased ROM. |
| Week 4 | Metabolic Stress | Combine Banded Bridges with “Pulses” (1/2 reps) at the top. |
Expert Summary
Transforming the gluteal region requires mechanical tension and metabolic stress. By mastering these four variations and adhering to the progressive plan, you provide the stimulus necessary for significant lifting and rounding of the posterior chain—no gym required.