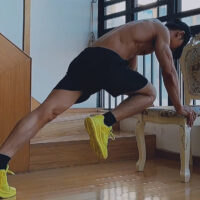
Exercise Guide
Achieving a high, volumetric, and genetically optimized gluteal profile requires an exact resistance training programming strategy. High-profile figures like Kim Kardashian shape their lower body not through random calisthenics, but via bi-weekly strength workouts targeting all three gluteal subdivisions: the Gluteus Maximus (volume and lift), the Gluteus Medius (side curves and upper shelf), and supporting posterior structures (hamstrings, quadriceps, and core). Utilizing moderate-to-heavy loads (20–40 lb dumbbells) and systematic tempo control is the definitive clinical key to triggering localized hypertrophy and structural remodeling.
1. The Posture-Power Good Morning (Hip Hinge)
This foundational hip-hinge pattern places the entire posterior chain under heavy eccentric elongation, stretching and strengthening the glutes under load to create an elevated, rounded baseline profile.

Step-by-Step Execution:
- Step 1: Stand tall with your feet placed precisely shoulder-width apart, with your toes externally rotated at a slight outward angle to accommodate optimal hip tracking.
- Step 2: Position a barbell securely across your upper back and posterior shoulders (or hold dumbbells firmly at your sides or against your chest for a scaled, accessible variation).
- Step 3: Actively brace your core muscles by pulling your navel toward your spine, lock your shoulder blades down, keep your chest high, and maintain your gaze forward.
- Step 4: Exhale and push your hips straight backward horizontally, initiating a pure hip hinge. Allow a minimal, soft bend in the knees as your torso lowers forward under full muscular control.
- Step 5: Continue descending until your torso is nearly parallel to the floor, or as deep as your hamstring flexibility allows, ensuring a strict neutral spine with absolutely no rounding or over-arching of the lower back.
- Step 6: Inhale, drive powerfully through your heels, and compress your glutes hard to thrust the pelvis forward, returning to an upright standing position with full hip extension.
- Step 7: Follow a strict, slow tempo: allocate 3–4 seconds for the lowering phase and 1–2 seconds for the rising contraction phase.
Prescription: 3–4 sets of 10–12 repetitions.
2. Frontal-Plane Banded Lateral Squats
This exercise isolates the lateral gluteal fibers, developing the upper side “shelf” and generating a comprehensive 3D roundness that fills out the hip silhouette from every angle.
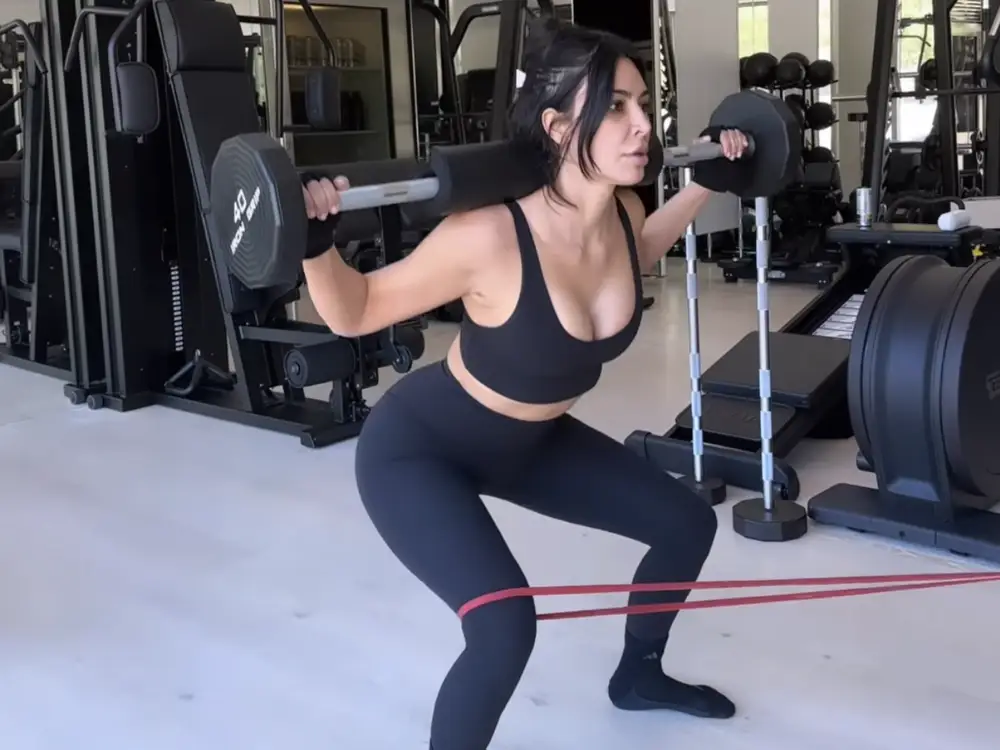
Step-by-Step Execution:
- Step 1: Position a high-density loop resistance band around your thighs, securely placed just above the knee joints.
- Step 2: Establish a standing posture with your feet positioned parallel and separated at shoulder-width (or slightly wider than hip-width) to create pre-activation tension against the loop band.
- Step 3: Exhale, push your hips horizontally backward, and flex your knees to lower your body into a deep, controlled partial squat position.
- Step 4: Maintain this low squat depth, then execute a wide, deliberate, and highly controlled step laterally to the right side with your right foot.
- Step 5: Press forcefully off your right foot to pull your left foot inward to a shoulder-width distance, keeping constant outward resistance on the band. Never let the band slacken.
- Step 6: Repeat the exact step sequencing toward the left side to ensure symmetrical lateral loading.
- Step 7: Focus on maintaining constant outward structural pressure against the band—knees must actively press outward over the toes, never allowing them to cave inward.
Prescription: 3–4 sets of 12 repetitions per side. Advanced Option: Hold a heavy dumbbell (up to 40 lbs) in a strict goblet hold at the chest.
3. Banded Kneeling Good Morning Thrusts
By removing the knee joint from the kinetic chain, this kneeling variation prevents hamstring dominance, offering complete isolation and maximal concentric contraction for the upper glutes.

Step-by-Step Execution:
- Step 1: Assume a kneeling posture on a supportive mat with a loop resistance band placed around your thighs just above the knees.
- Step 2: Place a barbell across your upper shoulders and traps (or hold a pair of heavy dumbbells securely resting against the clavicle/shoulder structure).
- Step 3: Contract your rhomboids to pull your shoulder blades together, stabilize your thoracic spine, and engage your deep core to protect the lower back.
- Step 4: Slowly sit your hips backward toward your calves, allowing your knees to track slightly wide against the resistance of the loop band.
- Step 5: Exhale and execute a powerful hip thrust, driving your pelvis forward and upward using exclusively gluteal power.
- Step 6: Achieve a complete lock-out at the top of hip extension, squeezing your glutes with maximal intensity for 2 seconds. Do not rely on momentum.
- Step 7: Inhale and slowly lower your hips back down toward your calves under a highly controlled 3-second descent.
Prescription: 3–4 sets of 10–12 repetitions. (Kim utilizes approximately 40 lbs of external resistance for this lift).
4. Front-Loaded Banded Goblet Squats
This compound move pairs deep mechanical loading with continuous hip abduction, strengthening core stabilizers while molding the global lower-body profile.

Step-by-Step Execution:
- Step 1: Secure your loop resistance band tightly around your thighs, positioned just above the knee caps.
- Step 2: Stand with feet positioned at shoulder-width, with your toes flared slightly outward at a 10–30 degree angle.
- Step 3: Elevate a heavy dumbbell or kettlebell to chest level, gripping it securely using a front-loaded goblet grip with your elbows tucked downward toward the floor.
- Step 4: Exhale, push your hips back, flex your knees, and lower your center of mass into a deep squat until your thighs drop parallel to or slightly below the plane of the floor.
- Step 5: Actively force your knees outward against the band throughout the entire eccentric phase to protect the knee joint and keep the hips engaged.
- Step 6: Inhale, press heavily through the midpoint of your heels, and drive vertically to a tall standing posture. Perform an aggressive glute contraction at the top.
- Step 7: Maintain a smooth, mechanical tempo with no pausing at the bottom of the movement.
Prescription: 3–4 sets of 12–15 repetitions. (Scaled option: Kim occasionally uses a lighter 20 lb load to prioritize spinal stabilization).
5. Deficit Elevation Reverse Lunges
Unilateral movement is essential to isolate muscle imbalances between limbs. Elevating the front foot provides a deficit that amplifies the stretch on the working glute, building distinct definition.

Step-by-Step Execution:
- Step 1: Stand directly on top of a stable low step, box, or platform measuring approximately 6–12 inches in vertical height.
- Step 2: Place your left foot fully and securely on the center of the elevated platform; this will serve as your primary working leg. Hold heavy dumbbells at your sides.
- Step 3: Exhale and step your right leg straight backward off the platform, lowering your body weight into a deep reverse lunge under absolute eccentric control.
- Step 4: Descend until both knee joints form strict 90-degree angles. Your front left thigh should drop completely below parallel, and your rear knee should hover mere millimeters above the floor.
- Step 5: Keep your torso tracking vertically upright, your abdominals braced, and your shoulders rolled back. Avoid leaning forward over the thigh.
- Step 6: Drive hard through the heel of your elevated front foot, utilizing the glute-hamstring connection to pull yourself back onto the platform.
- Step 7: Execute all prescribed repetitions on the left leg before switching to load the opposite limb.
Prescription: 3–4 sets of 10–15 repetitions per leg.
The 12-Week Physique Periodization Blueprint
- Frequency: Execute this sequence exactly 2 times per week, ensuring 72 hours of recovery between sessions.
- Overload Scheme: Begin with conservative loads to lock in form, then increase external resistance by 5% every week.
- Nutrition Framework: Pair this training with a protein-dense caloric structure (aiming for 1.6–2.2g of protein per kg of body weight) to support active muscle remodeling.
- Expected Timeline: Neurological firmness can be felt within 14 days; definitive structural lift and 3D contouring will be physically documented between weeks 4 and 12.
Commit to the architecture of your lower body. Move with absolute precision. Sculpt your strength.